
こんにちは、イノベーション本部の樋口です。
最近「メタバース」が注目されていることもあり、3Dモデリング周りについて調べる機会がありました。
今回はその中で気になった「PIFuHD」を使って、3Dモデルを作成し、動かして遊んでいきたいと思います。
PIFuHDとは
PIFuHDとは1枚の人物画像を3Dモデル化できる技術です。
引用:https://github.com/facebookresearch/pifuhd
3Dモデル作成
早速人物写真から3Dモデルを作っていきます。
まずは使用する写真を撮影。。顔は恥ずかしいのでぼかしています。
コードはPIFuHDのGithubで公開されているものを使用させていただきます。
※PIFuHDモデルの実行には、少なくとも8GBのGPUメモリが推奨されているため、今回はGoogle ColabのGPU環境を利用します。
ここからコード
colab にインストールされている Pytorch のバージョンが高く Pytorch3d が上手く動かないので、Pytorch 1.6.0 にバージョンダウンします。
INSTALLING PREVIOUS VERSIONS OF PYTORCHに従って適当なバージョンのtorchとtorchvisionをインストールします。
!pip install torch==1.6.0 torchvision==0.7.0
PIFuHDのgitリポジトリをクローン
!git clone https://github.com/facebookresearch/pifuhd
用意した画像をアップロード
%cd /content/pifuhd/sample_images
from google.colab import files
filename = list(files.upload().keys())[0]
各種パスの設定
import os

try:
  image_path = '/content/pifuhd/sample_images/%s' % filename
except:
  image_path = '/content/pifuhd/sample_images/test.png' # example image
image_dir = os.path.dirname(image_path)
file_name = os.path.splitext(os.path.basename(image_path))[0]

# output pathes
obj_path = '/content/pifuhd/results/pifuhd_final/recon/result_%s_256.obj' % file_name
out_img_path = '/content/pifuhd/results/pifuhd_final/recon/result_%s_256.png' % file_name
video_path = '/content/pifuhd/results/pifuhd_final/recon/result_%s_256.mp4' % file_name
video_display_path = '/content/pifuhd/results/pifuhd_final/result_%s_256_display.mp4' % file_name
画像を適切な位置にクロップ
%cd /content/lightweight-human-pose-estimation.pytorch/

import torch
import cv2
import numpy as np
from models.with_mobilenet import PoseEstimationWithMobileNet
from modules.keypoints import extract_keypoints, group_keypoints
from modules.load_state import load_state
from modules.pose import Pose, track_poses
import demo

def get_rect(net, images, height_size):
    net = net.eval()

    stride = 8
    upsample_ratio = 4
    num_keypoints = Pose.num_kpts
    previous_poses = []
    delay = 33
    for image in images:
        rect_path = image.replace('.%s' % (image.split('.')[-1]), '_rect.txt')
        img = cv2.imread(image, cv2.IMREAD_COLOR)
        orig_img = img.copy()
        orig_img = img.copy()
        heatmaps, pafs, scale, pad = demo.infer_fast(net, img, height_size, stride, upsample_ratio, cpu=False)

        total_keypoints_num = 0
        all_keypoints_by_type = []
        for kpt_idx in range(num_keypoints):  # 19th for bg
            total_keypoints_num += extract_keypoints(heatmaps[:, :, kpt_idx], all_keypoints_by_type, total_keypoints_num)

        pose_entries, all_keypoints = group_keypoints(all_keypoints_by_type, pafs)
        for kpt_id in range(all_keypoints.shape[0]):
            all_keypoints[kpt_id, 0] = (all_keypoints[kpt_id, 0] * stride / upsample_ratio - pad[1]) / scale
            all_keypoints[kpt_id, 1] = (all_keypoints[kpt_id, 1] * stride / upsample_ratio - pad[0]) / scale
        current_poses = []

        rects = []
        for n in range(len(pose_entries)):
            if len(pose_entries[n]) == 0:
                continue
            pose_keypoints = np.ones((num_keypoints, 2), dtype=np.int32) * -1
            valid_keypoints = []
            for kpt_id in range(num_keypoints):
                if pose_entries[n][kpt_id] != -1.0:  # keypoint was found
                    pose_keypoints[kpt_id, 0] = int(all_keypoints[int(pose_entries[n][kpt_id]), 0])
                    pose_keypoints[kpt_id, 1] = int(all_keypoints[int(pose_entries[n][kpt_id]), 1])
                    valid_keypoints.append([pose_keypoints[kpt_id, 0], pose_keypoints[kpt_id, 1]])
            valid_keypoints = np.array(valid_keypoints)

            if pose_entries[n][10] != -1.0 or pose_entries[n][13] != -1.0:
              pmin = valid_keypoints.min(0)
              pmax = valid_keypoints.max(0)

              center = (0.5 * (pmax[:2] + pmin[:2])).astype(np.int)
              radius = int(0.65 * max(pmax[0]-pmin[0], pmax[1]-pmin[1]))
            elif pose_entries[n][10] == -1.0 and pose_entries[n][13] == -1.0 and pose_entries[n][8] != -1.0 and pose_entries[n][11] != -1.0:
              # if leg is missing, use pelvis to get cropping
              center = (0.5 * (pose_keypoints[8] + pose_keypoints[11])).astype(np.int)
              radius = int(1.45*np.sqrt(((center[None,:] - valid_keypoints)**2).sum(1)).max(0))
              center[1] += int(0.05*radius)
            else:
              center = np.array([img.shape[1]//2,img.shape[0]//2])
              radius = max(img.shape[1]//2,img.shape[0]//2)

            x1 = center[0] - radius
            y1 = center[1] - radius

            rects.append([x1, y1, 2*radius, 2*radius])

        np.savetxt(rect_path, np.array(rects), fmt='%d')

net = PoseEstimationWithMobileNet()
checkpoint = torch.load('checkpoint_iter_370000.pth', map_location='cpu')
load_state(net, checkpoint)

get_rect(net.cuda(), [image_path], 512)
静止画から、人物の前後の画像、objファイルを作成
# レンダリング
%cd /content/pifuhd/
!python -m apps.simple_test -r 256 --use_rect -i $image_dir
pytorch3dで、objファイルから視点を回転させた画像を生成し、動画を作成
!pip install pytorch3d
from lib.colab_util import generate_video_from_obj, set_renderer, video

renderer = set_renderer()
generate_video_from_obj(obj_path, out_img_path, video_path, renderer)

# we cannot play a mp4 video generated by cv2
!ffmpeg -i $video_path -vcodec libx264 $video_display_path -y -loglevel quiet
video(video_display_path)
完成!
背面が少し歪な感じになりましたが、これで1枚の写真から3Dモデルが出来上がりました。

mixamoで3Dモデルにアニメーションを付けてみる
mixamoとは・・・
web上で3Dキャラクターのアニメーション付けができるサービス。特別なスキルがなくても3Dキャラクターデータがあれば、簡単にリギングやアニメーション付けが出来る。
では実際に作った3Dモデルを動かしてみます。
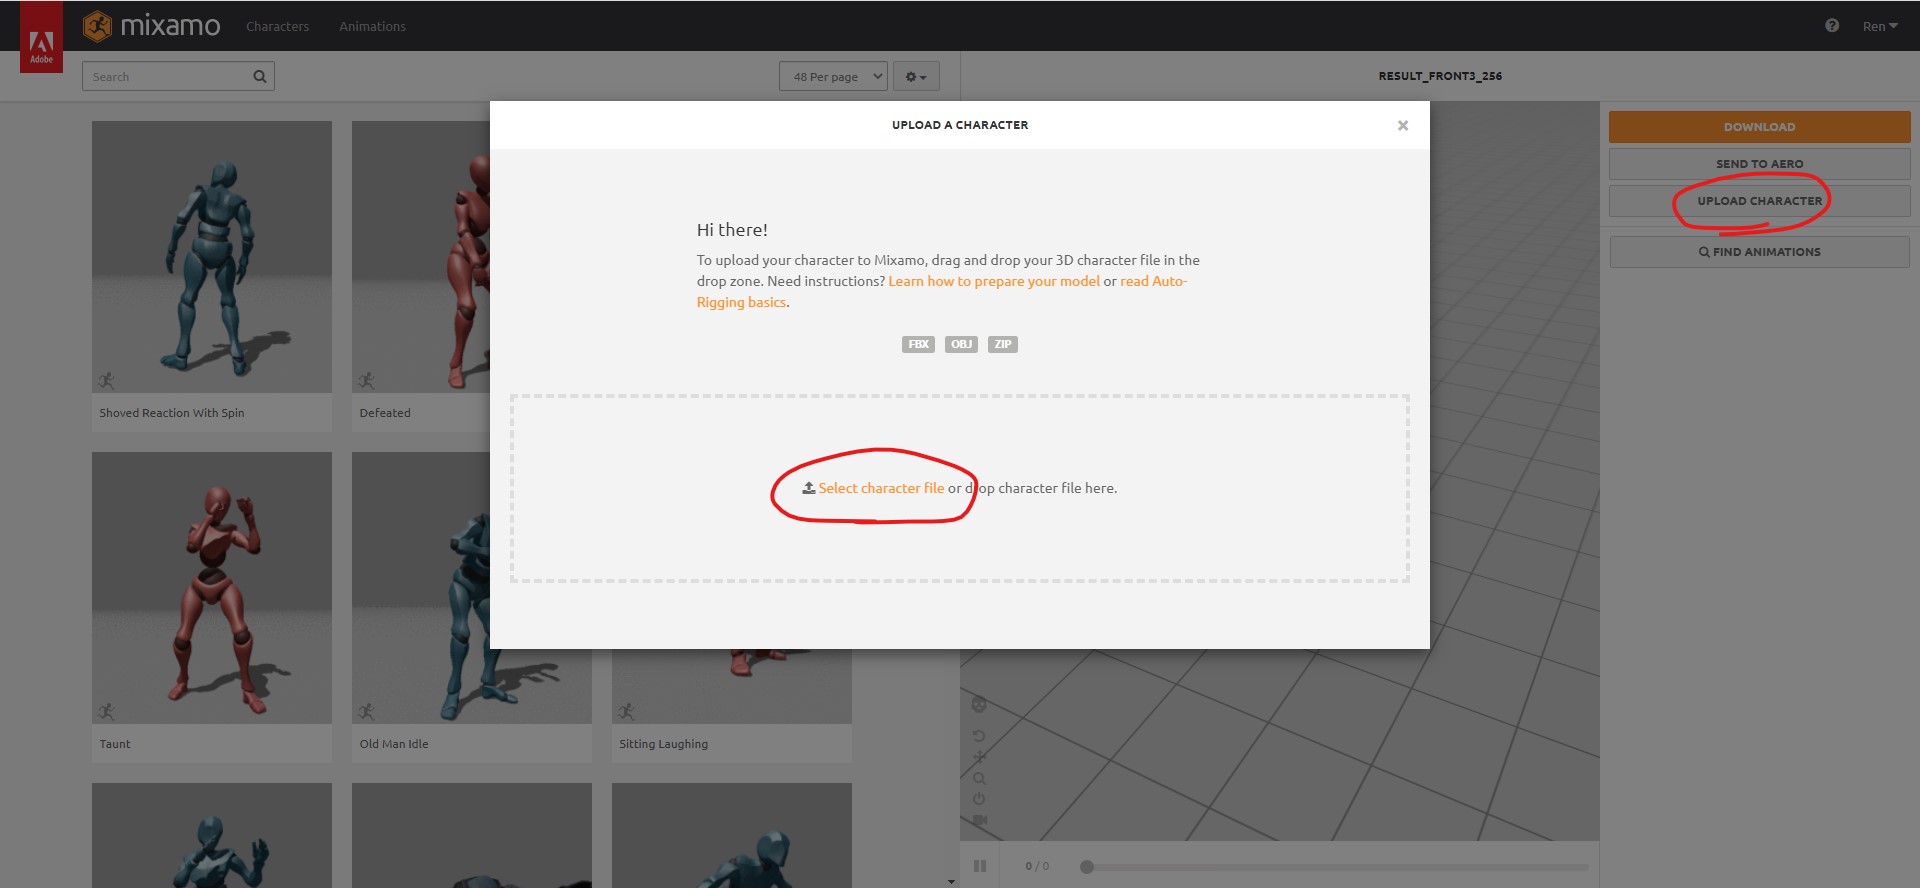
まずはmixamoへアクセスし、アカウント登録してログインします。
ログイン後、画面右側の「UPLOAD CHARACTER」>「Select character file」で3Dオブジェクトをアップロードします。
アップロードが完了したら、リギングを行います。
参考画像のように青→顎、黄色→肘、緑→手首、赤→股間、オレンジ見→膝の位置を設定しNEXTをクリックします。

さいごに、アップロードした3Dモデルにアニメーションを設定します。
画面左上にあるAnimationsから、色々なアニメーションを設定できます。

こんな感じで、アニメーションを付けることができました!!
さいごに
今回はモデリングなしでも3Dモデル作成して動かすことができました。今後は実際にモデリングツールにも触れてみて、テクスチャを張り付けたり、人物以外の3Dモデルも作って3D空間を構築してみたいです。
それでは、また次回お会いしましょう!
参考サイト